Software :: Hardware :: Network/Basic
Network/Advanced :: Security and Users :: System :: Misc ::
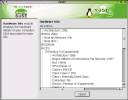
Hardware
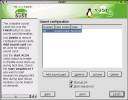
 Autodetect Printers is the first selection in the Hardware section of YaST2. In my case, with SuSE 7.3 installed in VMware, running in a Debian Host OS, I have no printer configured and available to autodetect. So instead, I used this tool to manually configure a remote printer, which is already shown in the listing.
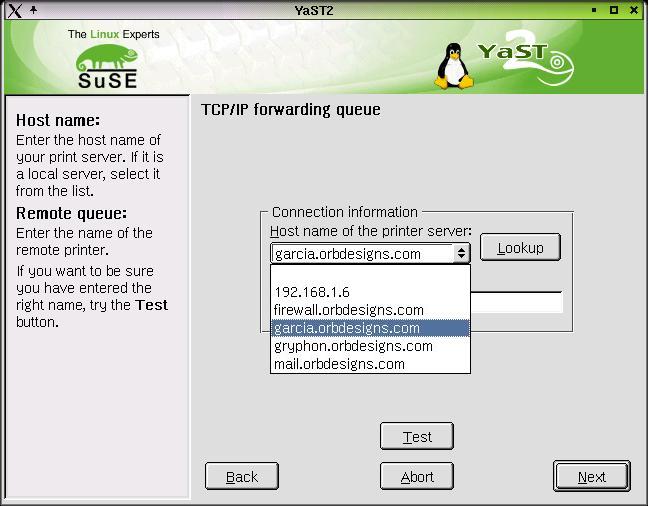
 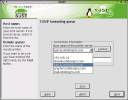 Various types of printers can be added: Parallel, USB and Serial local devices, LPD (UNIX/Linux host as well as JetDirect style printers), and other network printers: Samba/Windows and Novell printers. Selecting a forwarding queue to a remote LPD, I got the TCP/IP forwarding queue dialog, which incorporates a Lookup function to identify machines on the local network, by hostname if there's a local DNS server (as I have), or by IP address otherwise. Selecting the correct host and remote queue name, I can test for the remote printer's accessibility, and give it a local queue name (lp by default, although I name my queues by printer instead). Adding a windows printer is just as easy ... provided the correct driver or an acceptable substitute is available. For instance, there's no directly matching driver for Marcia's Epson Stylus 890. So I configured the printer for the Stylus 880. This configuration works for me. Some experimentation might be necessary, YMMV.
|
NOTE
Oddly, using the Lookup button didn't show me Marcia's windows box, just the two Linux boxen that I have Samba already configured on. I was hopeful that installing and configuring Samba would assist in correct detection of Windows hosts on the local network. No such luck. Not only that, but I find that the Samba configuration utilities are sorely lacking. I'm stunned. SWAT should work, of course, but only after I've enabled it in /etc/inetd.conf and started inetd. Unfortuneately, that doesn't help with this dialog box, but with the correct host name in place, the Lookup function for Name of remote queue works perfectly. Sigh. Still hinky.
|
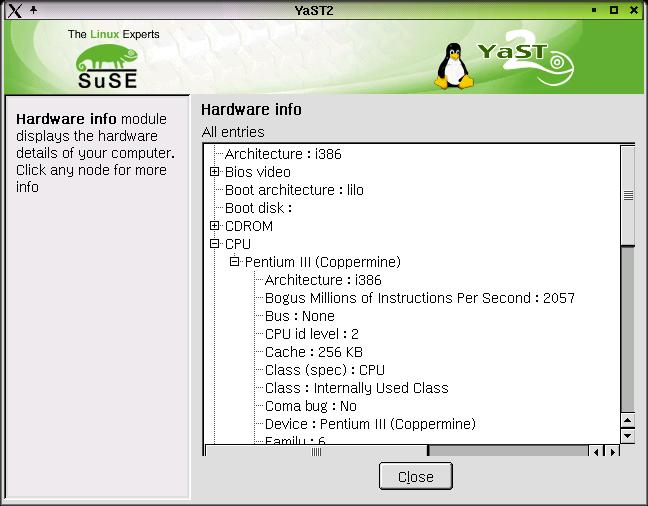
 Using the Hardware Info utility is fairly similar to the Device Manager tab in the Windows Control Panel --> System utility. One major difference is that this SuSE tool is truly informational only. Here is NOT the place to configure hardware, just to see what's been detected. This is VERY useful information if parts of your hardware don't work - it reveals the data necessary to ask coherent questions, or put the correct data in the right dialog box to configure bits like sound or video, for example.
The Scanner and TV Cards dialogs are used to assist in seting up these notoriously challenging pieces of hardware. I can't really review them since I have neither connected to this machine, much less available through the VMware interface. I'll welcome any input from readers for this section: Please include screenshots if appropriate - I can always crop down to just the referenced dialog window.
Edit Printers provides most of the functionality of the Autodetect Printers module, only without the initial Autodetect step. Personally, I'd use this route most of the time - I don't need autodetection, since I rarely change hardware. OTOH, Autodetect can yield up a clean basic configuration that can then be hand tuned. Up to you.
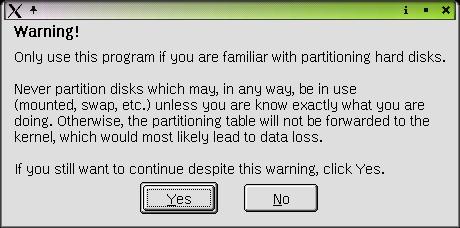
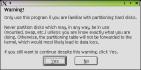 The Partitioner module from YaST2 is the same tool that we used while initially installing SuSE Linux 7.3. DANGER WILL ROBINSON - Here is a tool with which you can destroy your finely tuned Linux installation with a few errant clicks. The warning dialog, shown at right, is first displayed when you select Partitioner from YaST2.
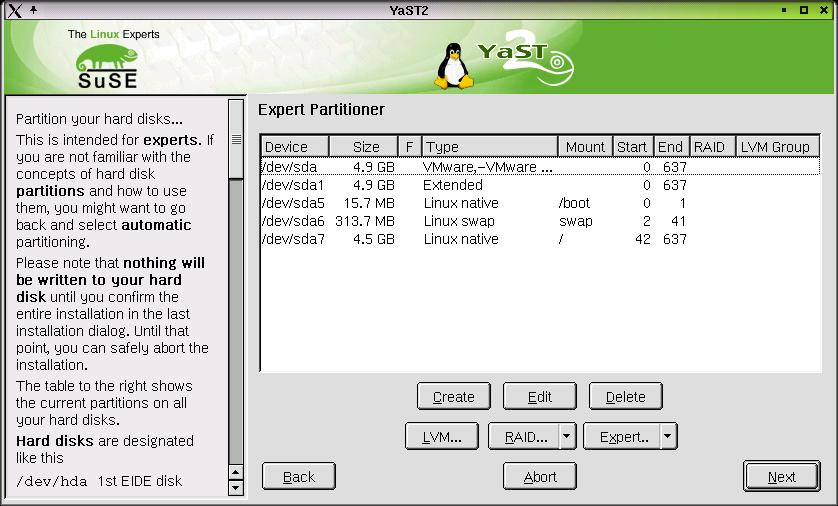
 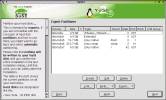 Clicking Yes opens the Expert Partitioner dialog, as shown at right. Generally this tool is only necessary for adding or removing storage from an existing system. Note that there are RAID and Logical Volume Management (Partitions can span multiple spindles) tools available here. Prudent system administration behaviour indicates that no changes should be made with this tool on a system that isn't protected with complete, tested, recent backups. On the gripping hand, if you know what you're doing with Linux system partitions, this is a good tool - just remember, a GUI tool means that you can make mistakes MUCH faster than with the command line, and a click is a click - there's not always the opportunity of re-reading the command prior to execution.
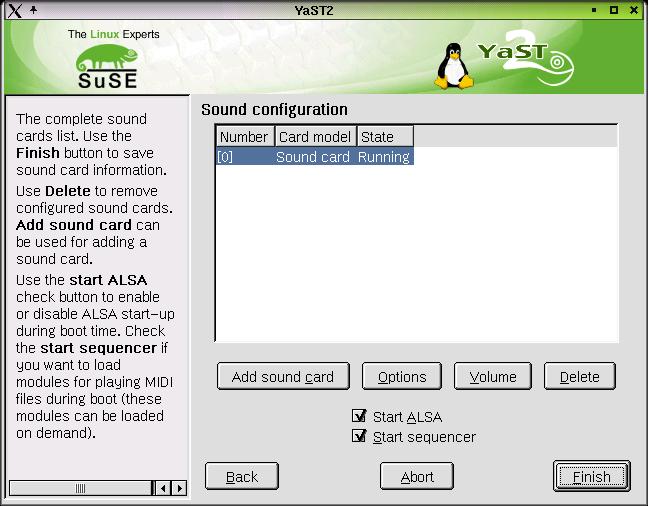
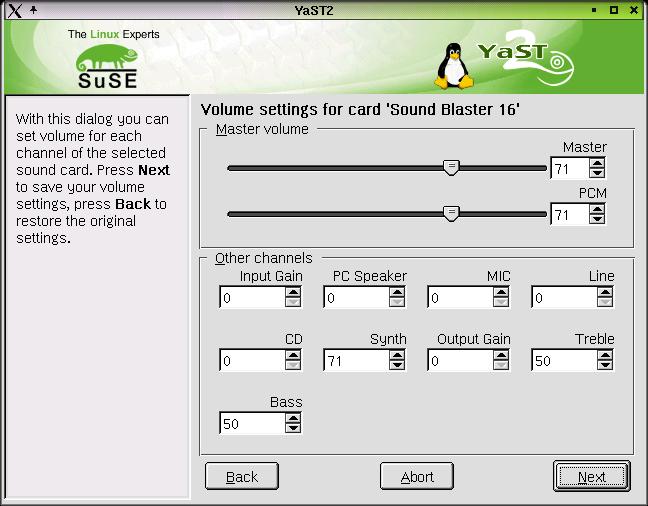
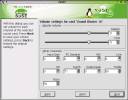 Installation doesn't always pick up the sound card - in that case, the Sound module from YaST2 permits fine-grained configuration of many popular sound cards, including some of the jumper-settable data from such legacy cards as the SoundBlaster 16, for example. Once configured, clicking on Volume permits setting a variety of input and output volume and gain controls, depending on the card you've configured. Very, very oddly, there's no feature to permit testing the sound card from within the setup module. Starting ALSA (the Advanced Linux Sound Architecture) and the MIDI Sequencer modules at startup are on by default, but can be deselected if desired (usually when running in a low memory environment).
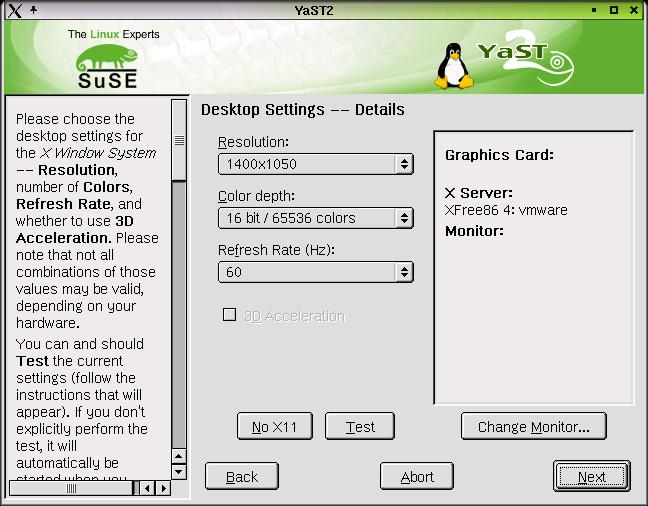
 X11 Configuration - for people new to Linux, X11 is the software that drives the video card and monitor at specified resolutions, and makes use of low level card circuitry (like 3D accelleration, for example) where that data is available.
 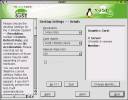 Window managers (like KDE, Gnome, WindowMaker, Blackbox, and others) make use of the X11 interface to drive the Graphical User Interface. That is, the Window manager doesn't have to know anything about the hardware, that's the job that X11 takes care of. Changing the resolution, color depth, and display clock rates is done by clicking on Change... This spawns an auto-probe process to determine hardware details for both the video card and monitor, when such data is available. After the flickering caused by the probe is complete, the Details dialog appears. Now settings can be changed, although they don't take effect until after X11 is restarted. Please note this doesn't mean a system reboot. It does mean stopping X11 and restarting it. (I'd suggest logging out of KDE, then press CTRL + ALT + Backspace to force an X Window system restart.)
Software :: Hardware :: Network/Basic
Network/Advanced :: Security and Users :: System :: Misc ::
All Content Copyright © 1999-2001 Brian P. Bilbrey.


 This, like all the other ODTL reports, is a purely personal and subjective report of my experiences with the software and/or hardware in question. If you try this at home, your results may match mine exactly. Alternatively, following these steps might make the neighbor boy start sleeping with sheep, cause your toaster oven to become Internet-connected, (then be hacked by some kid in Pasadena who lights your house on fire with it), and finally, may turn your low fat milk sour and chunky just as you raise the carton to your lips. YMMV, Caution Advised.